
CSV text file import into MySQL database
This example describes how the MySQL Adapter can be used to import a CSV text file into a MySQL database table. It also explains how to configure FlowHeater for importing with insert or update SQL operations.
Note: An export of data to a CSV or flat file follows the same principles, but where the Adapters on the READ and WRITE sides are swapped over.
The complete Definition described here can be found in the file Examples\MySQLAdapter\csv-import-mysql.fhd. All the examples are included in the downloaded ZIP archive of FlowHeater.
MySQL import table properties
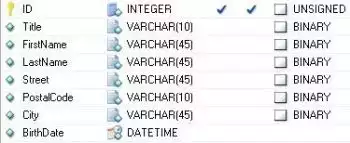 MySQL import table propertiesLet’s get started. First we must define the target MySQL database/catalog for the import. Using the MySQL Administrator or the MySQL Workbench to define a new database/catalog with the name "flowheater". Next create a new table called "Import" with the following fields.
This results in a new table of 8 columns (ID, Title, FirstName, LastName, Street, PostalCode, City, BirthDate) with an index of PrimaryKey. The PrimaryKey (ID field) has the additional property AUTO INCREMENT, the unique values assigned to the ID will be determined by MySQL itself and FlowHeater is not involved in this.
Now open FlowHeater and click on the menu option "New" to create a new Definition. In the resulting popup window select for the READ side the TextFile Adapter and for the WRITE side the MySQL Adapter.
TextFile Adapter Configurator
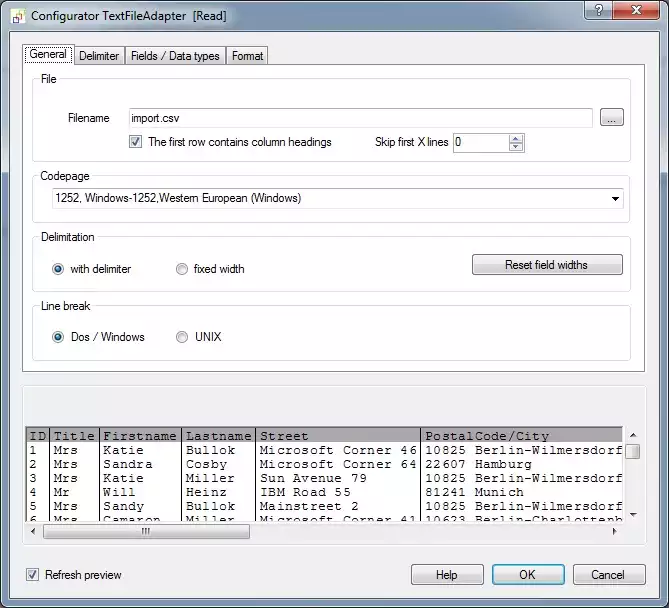 TextFile Adapter ConfiguratorConfirm with OK to close the popup and now open the Configurator for the READ Adapter and select the file import.csv in the directory "Examples\EN\MySqlAdapter". Check the checkbox "First row contains field names" and confirm the request of whether the field names should be loaded. All other settings on this page/tab should remain their defaults.
Terminate the popup window with OK and open the Configurator for the WRITE Adapter.
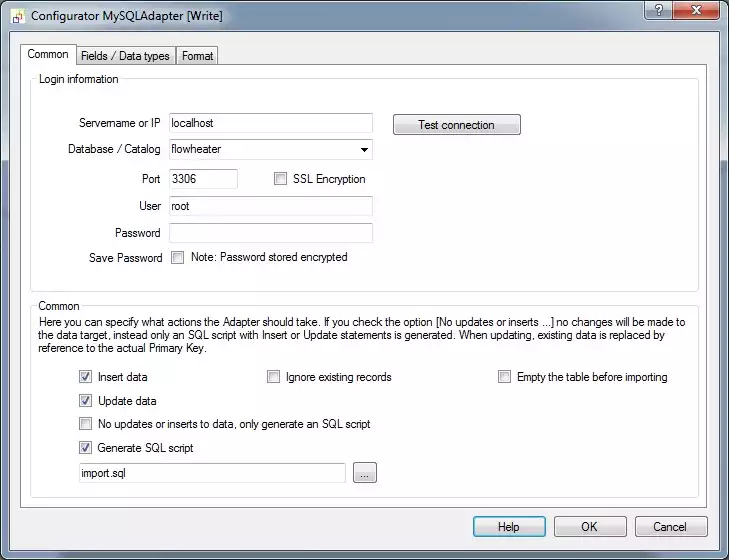 MySQL Connection properties
MySQL Connection properties
Enter the MySQL connection parameters applicable to your database server, by entering Servername or IP, User and Password and click "Test Connection" button. Once a connection has been achieved, select from the databases listed in the dropdown, selecting the MySQL database we created above called "flowheater". In the section at the bottom of this tab window, check the option Update data. Now switch to the "Fields / Data types" tab.
MySQL data types and field properties
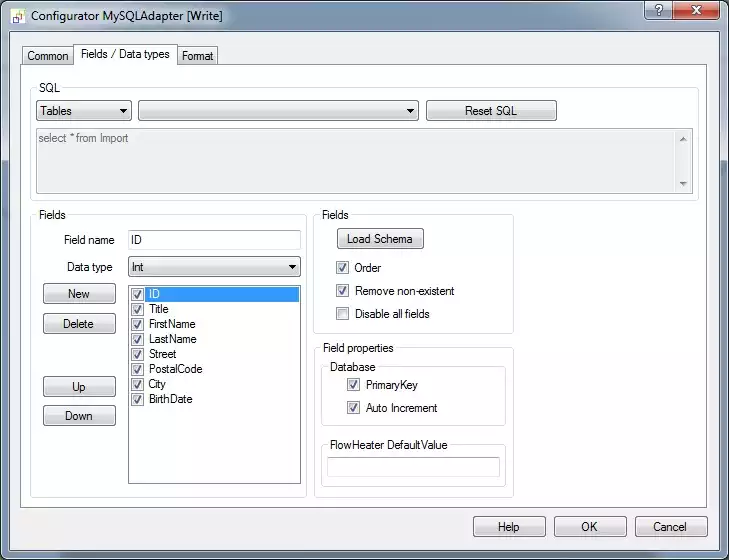 MySQL data types and field propertiesChoose the Import table from the dropdown and then click the "Load Schema" button to load the schema. This will import the field information of the table from the MySQL server in order to save these as part of the FlowHeater Definition. The details imported include the field names, data types, key information (Primary Key) and whether a field is assigned the “Auto Increment” attribute.
Important: The information imported at this stage can subsequently be modified to suit special cases. For example, you can amend Primary Key fields that are used to determine which fields the MySQL Adapter uses to perform an update function. However, such manual modifications do not alter the underlying MySQL table.
Autoconnect CSV-MySQL fields
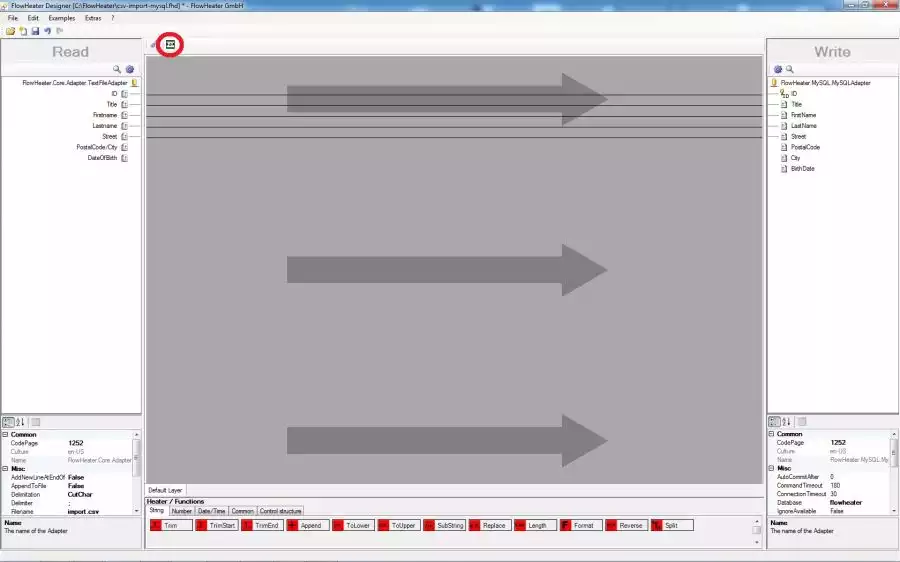 Autoconnect CSV-MySQL fieldsClose the Configurator popup with OK and click on the Designer command "Automatically connect fields" (circled in red). Your screen should now appear similar to the screenshot on the right.
Notice that we now have 2 unconnected fields on the READ side and 3 on the WRITE side. First construct a Pipe to connect the DateOfBirth field to the BirthDate field by dragging and dropping from one field to the other. Now move the mouse over this Pipe so that it is becomes bolder, indicating it is selected, and right mouse click to open the context menu for the Pipe. Choose the menu option Insert a Clone Heater. At your right mouse click position on the Pipe a Clone Heater will be inserted. Drag the newly inserted Heater further down the design area, stretching the Pipe with it. This makes some space where we can to insert two more Heaters, to split the combined PostalCode/City string field into two separate string fields as PostCode and City in our MySQL table.
Transform fields for import
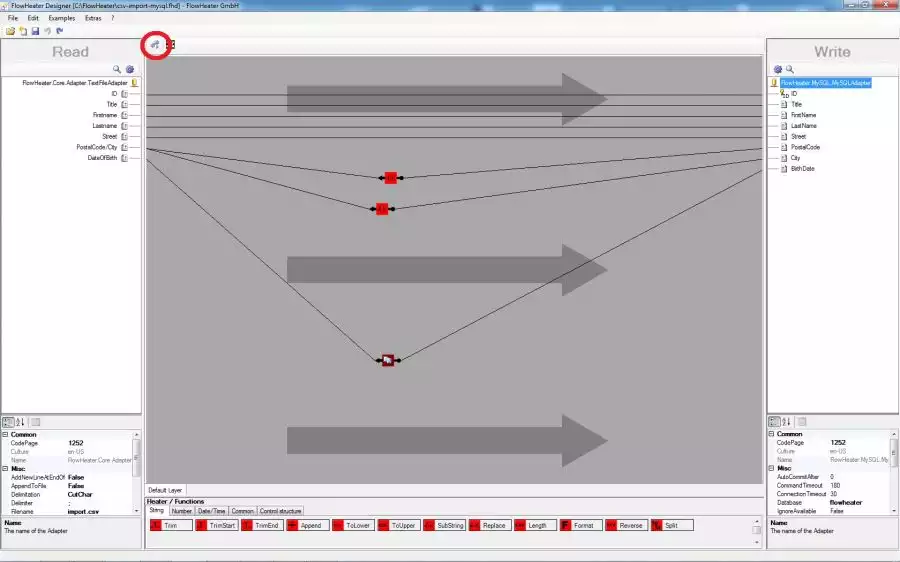 Transform fields for importTwice drag and drop the SubString Heater from the string Heaters selection area at the bottom of the Designer page to roughly level with the fields of PostalCode and City on the design area. Connect the PostalCode/City field on the READ side to both these SubString Heaters. Then connect one of the Heaters to the PostalCode field and the second Heater to the City field on the WRITE side. Next double click on the SubString Heater you just connected to the PostalCode field. Enter in the popup that opens a Start Offset value of 1 and Length of 5 and confirm with OK. Repeat this for the Heater connected to the City field, but instead enter a Start Offset of 7 and a Length of 0. Your screen should now look like the screenshot.
Note: The length of 0 we specified for City means until the end of the string.
Execute the data import definition
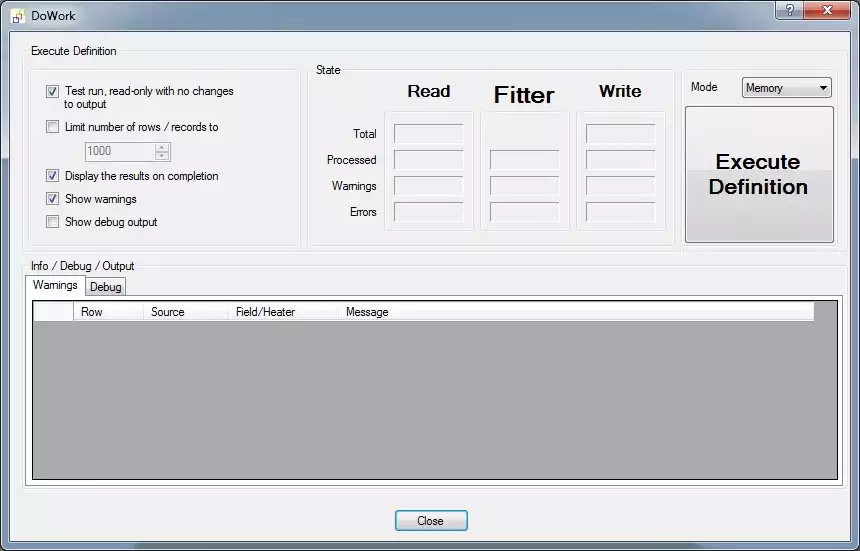 Execute the definitionNow execute the definition, either by clicking on the command button (circled in red) or by pressing F5 on the keyboard. This opens the FlowHeater execute and test window (see on the right). It is always prudent to first test an import before committing the actual changes to a database. So first try a test and check the results in this "Test and Execute" window. Leave the "Test run" option checked and click on the "Start Definition" button.
The label of the button will briefly change to read "Abort" and then the following window will appear. Note: The "Abort" button can be used to break off a time-consuming execution of a FlowHeater Definition at any point.
MySQL CSV import result
 MySQL CSV import resultHere we can see that FlowHeater has automatically recognized the ID field as an automatic or identification value. Close the window, uncheck the "Test run" option in the Execute and Test popup window and click Start Definition again. Now our CSV text file is actually written to the Import table in your MySQL database. Notice that the values in the ID column are now assigned actual values and in the first column "FH Action" has the value of insert. Run the Definition a second time and you will see that FlowHeater has recognized that this time it is a revision and so update appears in the "FH Action" column.
Open the Configurator of the MySQL Adapter and uncheck the option Update data. Press the Start Definition button again and observe the result this time (with and without a test run). This time FlowHeater inserts the records into the database again. You may be wondering why it is that the ID field is not copied from the CSV data into the database, because a Pipe connects them? The reason is it depends on the ID field, which is automatically assigned by the MySQL database because it has the AUTO INCREMENT property and the Pipe is only needed for updates.
MySQL CSV import tutorial video
MySQL® is a registered trademark of MySQL AB